Since my tutorial with Stewart I have been concentrating on painting on board and the scope this gives me for different sizes and groupings. After my initial painting experiments (and the pleasing results) I have moved on to creating bespoke floating panels that can be used in groups or individually. My Dad has been really helpful in devising processes and methods for creating frames and panels that are properly square and of a quality expected if making a purchase. My Dad gave me a masterclass explaining all the techniques and processes I would need to use to create a series of panels (me taking over the process as the day went on) and devising ways to hang them.
Me and my amazing Dad
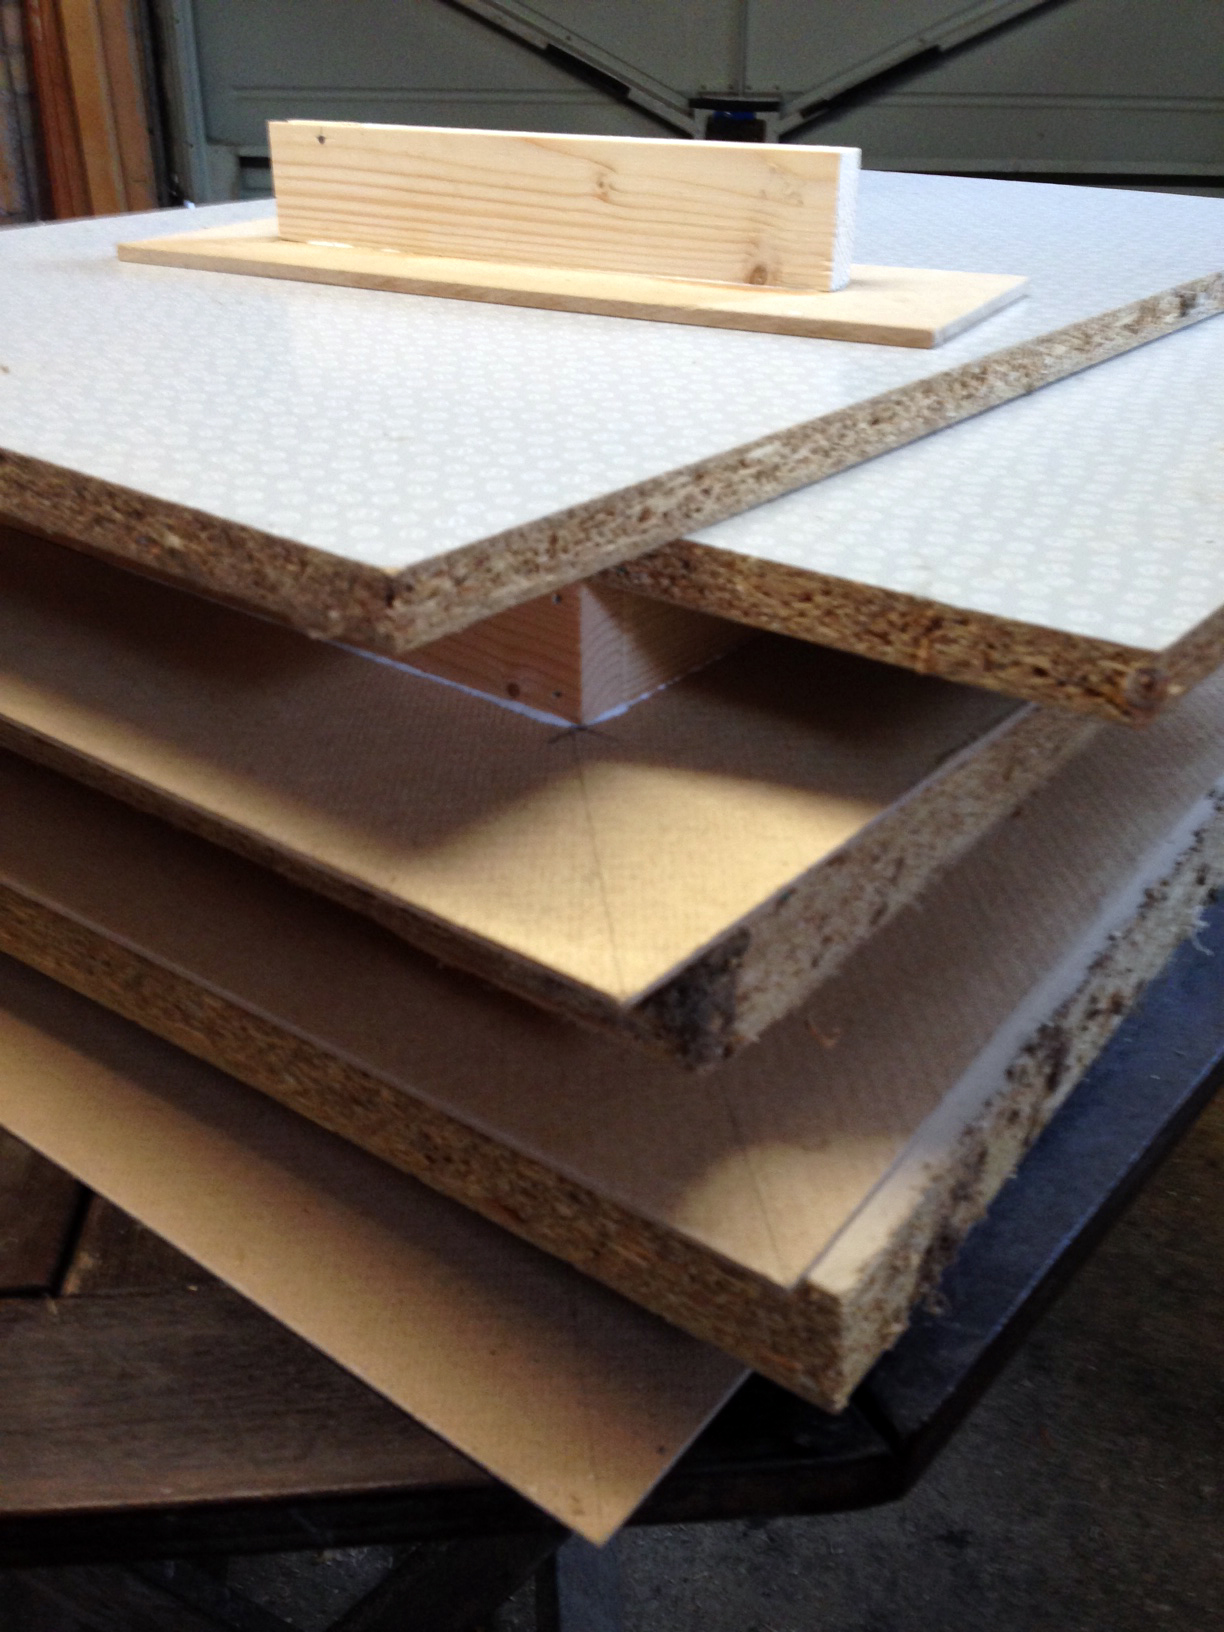
The boards we cut were 6mm mdf and 3mm hardboard with a white face. The mdf is for long thin panels (as it is sturdier and thinner, therefore weight is less of an issue) and the hardboard is for larger panels which are stabilised by the backing frame and weigh less.
Dad showed me how to cut the panels precisely – cutting to the inside of the drawn pencil line to ensure that the panels don’t get bigger and bigger – and to use the first cut piece (with the machined edge) as the template panel to draw around for the subsequent matching panels, as this edge is guaranteed to be straight. My sawing improved as time went on and was reasonably straight. I could get them machine cut at B&Q/Homebase or continue to do them by hand. We made the best use of the boards to create as many panels as we could. I had already decided I wanted to try some thin vertical and horizontal groups of stripes and had a couple of panels left over as tests or individual pieces. The hardboard luckily went into 3 identical panels.
In the images below, you can see the thin mdf panels in the background and the hardboard panels ready to be cut.


Dad has made me a series of little gadgets to enable me to make square backing frames that will make the boards stable and float away from the wall. It is important to measure the frame width to be central to the panel – taking the width of the panel, minus 2x the inset distance. The two long edges of the panel frame should be cut to this distance – and the 2 shorter ones should be the length of the longer ones MINUS the width of the TWO frames pushed together. I should have taken some photos of these in progress, but didn’t. Dad made me a special gadget to drill holes into the ends of the longer pieces (in a dovetail position – making it harder for them to come out) ready to nail them end on to the shorter panels – along with some vices to hold them square. I have to position the shorter and longer pieces in the vice to line up correctly, then remove the longer one to apply a line of glue at the point where it meets the shorter one. Put them back into the vice and nail in place. Repeat for the other corner on this piece. When applying the final long end, apply glue to both edges before nailing the first edge, as it won’t be possible to apply glue the other end once you have fixed the first (it’s too tight). When the final nails are done, check that the frame is square – if it isn’t whack it a bit diagonally and this should do the job. Once that is sorted add in some corner pieces with glue (held in place with elastic bands) to ensure the frames remain stable and square.


You can apply these to the back of the panels by measuring and positioning centrally to the panel, OR (if both are dead on square) by drawing lines from corner to corner on the back of the panel and placing the frame corners on the appropriate lines. All of mine needed measuring!
Apply glue to the frame and place onto the board – wiggle it about a little to spread the glue and ensure the correct position. Leave something large and heavy on top whilst the glue dries so there is no warping. Here are my 3 panels drying – with some weighty panels on top and a test piece of mdf.
The MDF have posed a real question as to how to hang them. They need to hang flush to the wall all the way up and down to stop the panels from swaying or leaning – but the fixings really need to be hidden. Equally, we can’t tell what walls the finished item would be fixed to (plasterboard, plaster, brick etc) so we wanted a solution that would apply to all these materials.
Dad came up with an ingenious plan to create a recess in the float-frame with a pin positioned through it. This means the load will not pull out the ‘fixing’ as a top mounted ‘eye’ would. Side mounted eyes with wire would likely show and create a great deal of instability. This option allows us to use small picture hooks, plasterboard picture hooks, picture pins or even screws to hold the panels in place.


We tried various brackets, hooks and options to hang these and this was the most stable – and elegant – of all the materials and techniques we tried. For horizontal versions of these, we will try using eyes to the edges of the float frame and a tight wire from which to hang them. These will be less stable, – but no more so than any other painting of a comparative size and I can use 2 fixings in the wall to help.
Below is the test of the panels hanging next to one another (there will be 5 altogether), the frame with eye fixings and a wire and some blocks Dad made me to hold the panels whilst I paint them (as this will be tricky now they are fixed to the frame).


The experiments I made with a small strip of stripes overlaid on the main panel made me think a lot about the interaction of colours. I have recently been making some knitted items that can inform, and is having an impact on, my practice.
I am a big fan of Knitty.com: an online community magazine for knitters – where people can contribute patterns for publication. One such pattern in this issue is the Princess Franklin Plaid Collar. It is one of those projects that is ‘reasonably’ quick to do (well the knitting part is) and can use up ‘stash’ wool. The great thing with this is that I get to play around with colours. I can choose how they sit alongside one another and how they interact. Another thing I have really liked using is variegated or hand-dyed yarns – as there is a ‘chance’ element to the interaction of the colours and is often where the most interesting sections are.
I have frequently taken photos of these for the day’s entry in my colour diary. This not only adds the colours to the diary (from the interactions I notice most) but also strengthens my subliminal skills at grouping colours. It is interesting that the main body of this cowl is stripes – which in themselves reflect my paintings, but also that the interwoven colours of the plaids allows each colour to interact with more than its direct neighbour.
Enjoy finding the interactions that push your buttons.


I’ve taken another ‘day’ from my colour diary to play with creating plaids.These ones are hot and vibrant and really quite intense and aggressive!


